


For coffee lovers, nothing beats the rich, creamy texture of a well-frothed milk that turns your daily cup into a luxurious experience. While cow’s milk has traditionally been the go-to choice for frothing, plant-based milks are becoming increasingly popular. They offer a variety of flavors, textures, and nutritional benefits without the dairy. However, frothing plant-based milk can be a bit tricky since each type behaves differently.
If you love your lattes, cappuccinos, or macchiatos and want to master the art of frothing plant-based milk, here are some essential tips to help you achieve that perfect foam every time.
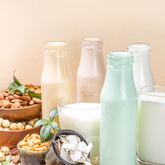
Choose the Right Plant Milk for Frothing
Not all plant milks are created equal when it comes to frothing. Some plant-based milks froth better than others due to their protein, fat, and stabilizer content. Here are some of the best options:
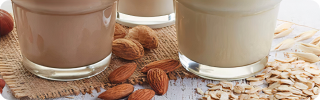
Oat Milk: Oat milk is a favorite among baristas for its creamy texture and ability to froth well. It has a balanced fat and protein content, which helps create a smooth and velvety foam. Look for barista-style oat milk options for the best results.
Soy Milk: Soy milk has a high protein content, which allows it to froth similarly to dairy milk. It creates a dense and stable foam, perfect for cappuccinos and lattes.
Almond Milk: Almond milk can froth well but tends to produce larger bubbles and a less stable foam compared to oat or soy milk. To improve frothing, opt for barista blends of almond milk, which are specially formulated to create a smoother, more stable foam.
Coconut Milk: Coconut milk has a high fat content, which helps create a rich, creamy foam. However, it can be a bit heavy, so it’s often best mixed with other plant milks for a balanced froth.
Cashew Milk: Cashew milk has a creamy texture and froths fairly well, creating a foam that’s a bit thicker and richer. It’s a good option for those who like a creamier taste in their coffee.
Use Fresh, Cold Milk
For the best frothing results, always use fresh, cold plant milk. Cold milk holds air better during the frothing process, which helps create more stable foam. Ideally, milk should be around 4°C (39°F) before you start frothing. Avoid using room temperature or lukewarm milk, as it will not froth as well and can result in flat foam.
Shake or Stir the Milk Before Frothing
Some plant milks can separate over time, with the creamier parts settling at the bottom of the container. Give your plant milk a good shake or stir before frothing to ensure even consistency and to mix any settled fats and proteins that help with frothing.
Use the Right Frothing Tool
There are several tools you can use to froth plant milk, each yielding different results:
Steam Wand: A steam wand is the most effective tool for frothing any type of milk, including plant-based. It injects steam into the milk, creating microfoam that is creamy and dense. If you have an espresso machine with a steam wand, use it to achieve the best results.
Handheld Milk Frother: A handheld frother is an affordable and easy-to-use tool for frothing plant milk. It works well with most types, though the foam may not be as smooth as with a steam wand.
French Press: A French press can be used to manually froth plant milk. Simply heat the milk, pour it into the French press, and pump the plunger up and down until the milk doubles in volume and is frothy.
Electric Milk Frother: An electric frother can automatically heat and froth plant milk to the perfect consistency. This is a convenient option for those who want a quick and easy way to froth milk.
Froth at the Right Temperature
Heating plant milk to the right temperature is key to achieving the best foam. Overheating can cause plant milk to break down, lose its ability to froth, and even curdle. The ideal temperature for frothing plant milk is between 55°C and 65°C (130°F to 150°F). Use a thermometer to keep an eye on the temperature, or simply touch the frothing pitcher—if it becomes too hot to touch, it’s overheated.
Perfect the Frothing Technique
If you're using a steam wand, here’s how to achieve the best results:
- Pour cold plant milk into a frothing pitcher, filling it to about one-third of its capacity.
- Submerge the steam wand just below the surface of the milk and turn it on. Keep the tip of the wand near the surface to introduce air, which creates foam.
- Once you see the milk start to expand and form microfoam, lower the wand slightly deeper into the milk and angle the pitcher to create a whirlpool effect. This step helps create smaller bubbles and a smoother texture.
- Turn off the steam wand when the milk reaches the desired temperature (55°C to 65°C). Tap the frothing pitcher on the counter and swirl it to remove any large bubbles.
Add a Stabilizer for Better Foam
Some plant milks benefit from the addition of a natural stabilizer to improve frothing. For instance, adding a small amount of lecithin or xanthan gum to almond or cashew milk can help create a more stable foam. Start with a tiny pinch and blend it into the milk before frothing.
Practice Patience and Experiment
Frothing plant milk can take some practice to get just right. Different brands and types of plant milk froth differently, so don't be afraid to experiment with different options to find the one that works best for your taste and texture preferences. Be patient and keep experimenting with frothing techniques, temperatures, and tools until you find the perfect method for your coffee routine.
Pour Slowly for Latte Art
If you want to create latte art, frothing plant milk to the right consistency is essential. Aim for a glossy, smooth microfoam with tiny bubbles. When pouring, tilt the cup and pour slowly into the center, raising the pitcher higher to control the flow. As the cup fills, bring the pitcher closer and pour a bit faster to create designs like hearts, rosettas, or tulips.
Frothing plant-based milk requires a bit of finesse, but with the right milk, tools, and techniques, you can achieve a creamy, velvety foam perfect for your lattes and cappuccinos. Whether you prefer the creaminess of oat milk, the richness of soy milk, or the unique flavor of almond milk, mastering these tips will help elevate your plant-based coffee experience to the next level.
With Milky Plant you can create fresh, high-quality plant-based milk at home, ensuring your froth is free from additives and packed with natural flavor. Experiment with different types of milk, find your favorite, and enjoy barista-quality coffee right in your kitchen. Happy frothing!